Photographers
My Own Cloud
1x Blog-Photographers' .
Canon 7D . Canon 10-22mm . f/14
I started my actual walk in the late morning on a sunny Saturday in September. The sun was shining and the sky was blue with a few clouds. Every building had its own distinctive structure and interesting point of view. I walked among the buildings, taking photos from far away with a telephoto zoom or closer to the front of the buildings with a wide-angle lens.
As I walked from one building to another I learned how to find a special point of view. For me, the most interesting pictures were those that had high contrasts between the glass and stone. I realized then that I love making photos with intriguing reflections in the glass, like clouds or other colorful objects.
In my backpack I had some filters to make my photos as good as possible when the light is harsh. I was carrying a polarizing filter and three different neutral density (ND) filters. Because I had bought an expensive Lee filter holder I was able to combine two ND filters and the polarizing filter; this specific photo was made with the polarizing filter and a 0.9 ND graduated filter. The sun was shining behind me, so the polarizing filter only affected the image slightly, but it still darkened the sky and the blue reflections in the window a bit.
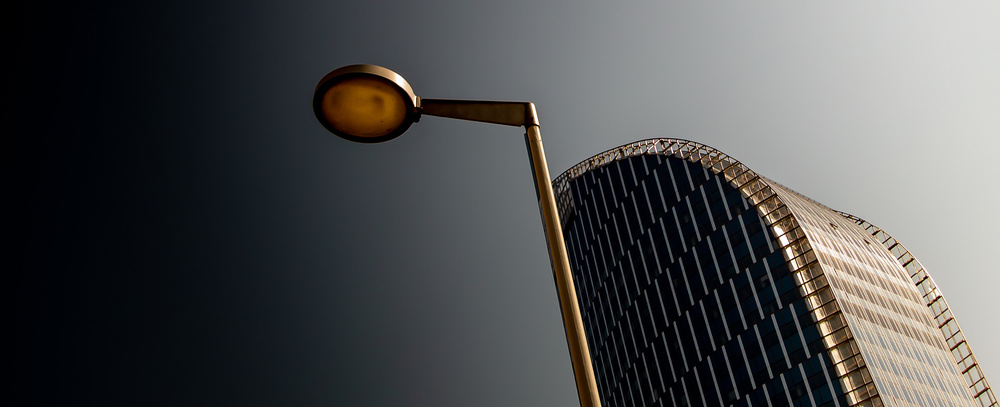
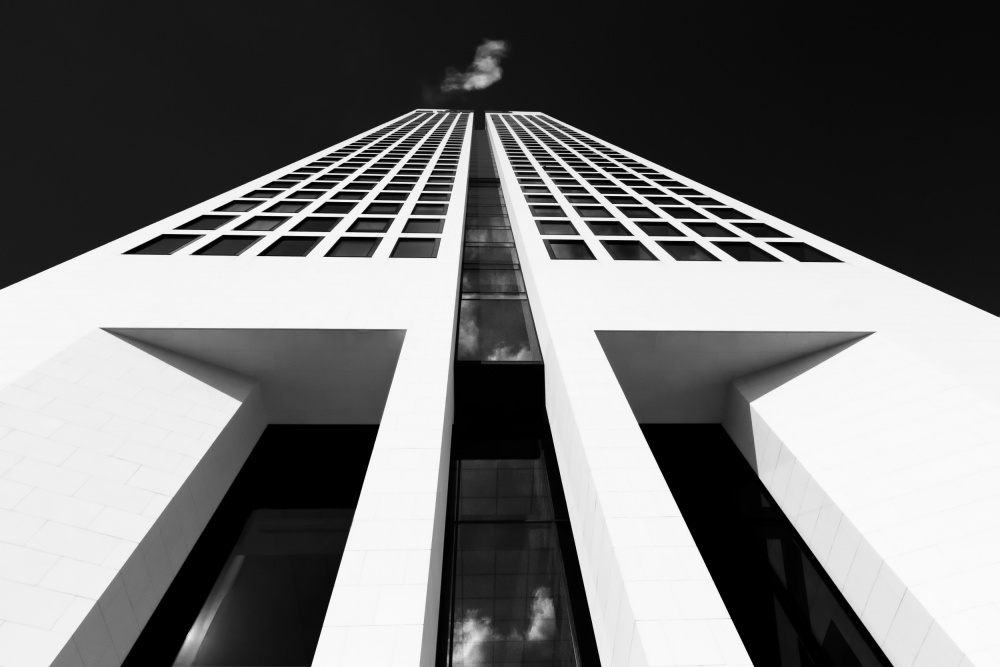
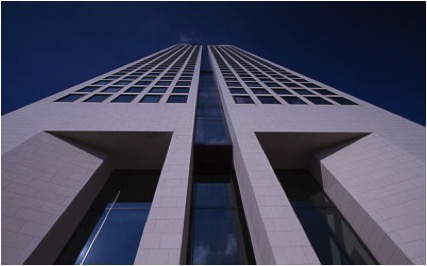
At first sight this building wasn't as interesting as it looks in the final photo. It has a tall, white facade with small windows, and the dominant shapes are rectangles. Graphically speaking, there are two main vertical blocks linked together by a continuous, dark glass rectangle in the middle. I decided that I could make an interesting photo with the wide-angle lens. I stood near the entrance of the building, looking upward. By using this lens and relying on the converging lines that it would produce I could make the building appear more abstract. The sun created hard shadows on the wall, producing strong geometric effects. The reflections of the clouds in the windows were great in this photo as well. I love the contrasts of black and white and the story of smooth, soft objects reflecting in this strong, structural building.
These selections allow me to apply specific adjustments to each selected area. Every selection was saved as its own channel: with the selection active, I went to Select > Save Selection and named the selection, which created a new channel. This way I can always go to Select > Load Selection and activate the channel I want to work on at any time. Moreover, these saved selections can be added to or subtracted from another channel in the Save Selection dialog box.
4) When I was making the selections, I was zoomed into the image somewhere between 100% and 800%. These selections had to be precise; otherwise, halos and other negative effects would appear when I adjusted exposure levels and tonal correction levels. While I was processing this image, creating these selections took the most time. The better you are in making selections, the faster your post-processing will go, but like everything else, it takes some practice to become efficient.
5) Before working creatively in Photoshop, I applied Nik Sharpener Pro plugin to sharpen the photo in a subtle but effective way.
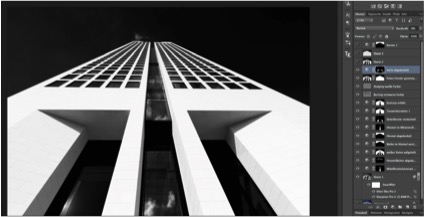
6) Back in Photoshop, I created a Smart Object layer and then exported the image to Nik Silver Efex Pro 2 plugin to convert it to black and white. I applied the default black and white conversion and then set Brightness to 10% and Contrast to 18%. Using a Smart Object layer is a very good choice if you want to make other adjustments later on.
7) After this laborious, not very creative work, I began to make special adjustments in Photoshop to the areas of the photo I wanted to enhance:
a) First, I activated my selection of the glass in the middle of the building, applied the Levels tool (Image > Adjustments > Levels) and enhanced the contrast and shadows by moving the sliders to the left side.
b) Then I used the selection of the small windows and darkened them with the Curves tool (Image > Adjustments > Curves).
c) I made the building brighter by activating the saved selection of the building without the windows and moved the sliders in the Levels tool to the right side.
d) I increased the contrast of the sky by using the Levels tool once again on the saved selection of the sky. I also darkened the sky by using the Curves tool.
8) I noticed more adjustments needed to be made:
a) I enhanced the contrast of the glass in the middle of the building once again by using the Levels tool.
b) I darkened the bottom-left and bottom-right windows by using the Levels tool.
c) Then I enhanced the contrasts of the building by applying the Levels tool to the building selection and moving the sliders to brighten those areas.
9) For the next step I used the TK Actions Panel by Tony Kuyper. This actions panel is a powerful collection that makes special selections or effects by using scripts in Photoshop. I created two new layers — one for dodging areas (to make them brighter) and one for burning areas (to make them darker) — and used the Brush to act as Dodge and Burn tools. I darkened the windows by activating the windows selection on the Burn layer and brushing on the layer to burn the windows.
10) The next step was to brighten the dark windows in a subtle way. For that I used the Dodge layer I created in Step 9. I brightened the windows using a white Brush with Opacity set to about 15%.
11) After that I used the Clone Stamp tool to remove some disturbing spots in the bottom-left window (some very bright metal cables and a dark, dusty shadow on the wall.)
12) Then I used the Levels tool once again to enhance the dark shadows in the overall image, creating a wonderful geometric structure at the bottom of the building.
13) Next, I darkened the left side of the sky so the light looked even. To do this, I used the Levels tool and applied a layer mask of the sky selection.
14) At this point I was happy with contrasts and tones. The photo had all the elements to make it more interesting than the original image. The only part that wasn't working for me was the wispy cloud at the top of the building; it just wasn't enough. So I copied a cloud from another photo that I found in my photo archives and added it as a new layer.
15) The last step was to remove noise from the photo with Nik Dfine 2 plugin. This is a magical tool that performs noise removal in a very effective and subtle way.
. '
by Tommi
While visiting Frankfurt am Main for a photo walk, I decided to concentrate on architecture photography. In this big town there are lots of skyscrapers and a lot of other interesting buildings. It's a town that is often visited by photographers. It seems that every building has been photographed so many times from every point of view that it is impossible to create an extraordinary picture. How could I manage to make my own special photo?
I was well-prepared before I started the journey. I spent many hours at home exploring the best route, from one interesting building to the next, by taking a virtual walk using Google Maps street view. I wanted to get an idea of how the buildings could be seen from the street and if there was a chance to capture a unique view without distracting elements in the composition.
I started my actual walk in the late morning on a sunny Saturday in September. The sun was shining and the sky was blue with a few clouds. Every building had its own distinctive structure and interesting point of view. I walked among the buildings, taking photos from far away with a telephoto zoom or closer to the front of the buildings with a wide-angle lens.
"I realized then that I love making photos with intriguing reflections in the glass, like clouds or other colorful objects."
As I walked from one building to another I learned how to find a special point of view. For me, the most interesting pictures were those that had high contrasts between the glass and stone. I realized then that I love making photos with intriguing reflections in the glass, like clouds or other colorful objects.
In my backpack I had some filters to make my photos as good as possible when the light is harsh. I was carrying a polarizing filter and three different neutral density (ND) filters. Because I had bought an expensive Lee filter holder I was able to combine two ND filters and the polarizing filter; this specific photo was made with the polarizing filter and a 0.9 ND graduated filter. The sun was shining behind me, so the polarizing filter only affected the image slightly, but it still darkened the sky and the blue reflections in the window a bit.
"By using this lens and relying on the converging lines that it would produce I could make the building appear more abstract."
At first sight this building wasn't as interesting as it looks in the final photo. It has a tall, white facade with small windows, and the dominant shapes are rectangles. Graphically speaking, there are two main vertical blocks linked together by a continuous, dark glass rectangle in the middle. I decided that I could make an interesting photo with the wide-angle lens. I stood near the entrance of the building, looking upward. By using this lens and relying on the converging lines that it would produce I could make the building appear more abstract. The sun created hard shadows on the wall, producing strong geometric effects. The reflections of the clouds in the windows were great in this photo as well. I love the contrasts of black and white and the story of smooth, soft objects reflecting in this strong, structural building.
POST PROCESSING
I always shoot in RAW format. I copy the RAW files to my hard drive, and then I import them into Lightroom (here version 4.4) where I select the image and make a few basic adjustments. Afterward, I export the image to Photoshop CS6 to further process the photo, and for this image, I also used Nik Software's plugins Sharpener Pro, Silver Efex Pro 2 and Dfine 2.
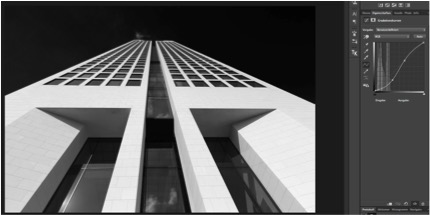
1) As you can see on the histogram the photo was a bit underexposed.

So I made an Exposure adjustment in Lightroom, increasing it to +0.25. I also increased the Highlights in the Tonal Curve panel to +20. Then I finished in Lightroom in the Lens Corrections panel by selecting Enable Profile Corrections and Reduce Chromatic Aberration, allowing Lightroom to adjust these setting automatically.
2) While I was shooting, I envisioned making an abstract photo showing the beautiful structure and geometric shapes of the building. So my aim was not to make a documentary photo of this building but a more special one with much more mood. For me, black and white photos are the best way to show most of the structure of an object. Therefore, it was time to export the photo to Photoshop CS6 to make the next adjustments.
3) To enhance the main structures and remove the disturbing elements and bright spots I made some selections, using a combination of the Magic Wand and the Polygonal Lasso tools.
Original RAW image
1) As you can see on the histogram the photo was a bit underexposed.
Lightroom: Histogram
So I made an Exposure adjustment in Lightroom, increasing it to +0.25. I also increased the Highlights in the Tonal Curve panel to +20. Then I finished in Lightroom in the Lens Corrections panel by selecting Enable Profile Corrections and Reduce Chromatic Aberration, allowing Lightroom to adjust these setting automatically.
2) While I was shooting, I envisioned making an abstract photo showing the beautiful structure and geometric shapes of the building. So my aim was not to make a documentary photo of this building but a more special one with much more mood. For me, black and white photos are the best way to show most of the structure of an object. Therefore, it was time to export the photo to Photoshop CS6 to make the next adjustments.
3) To enhance the main structures and remove the disturbing elements and bright spots I made some selections, using a combination of the Magic Wand and the Polygonal Lasso tools.
Selection of the sky
Selection of the building, excluding the glass in the middle of the facade
Selection of the glass in the middle of the facade
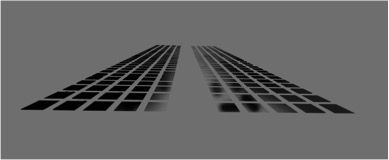
Selection of the small windows
Selection of the bottom-left window
Selection of the bottom-right window
Selection of the shadows on the wall
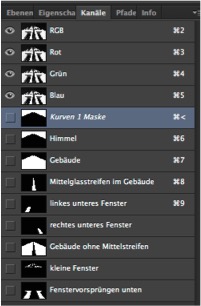
These selections allow me to apply specific adjustments to each selected area. Every selection was saved as its own channel: with the selection active, I went to Select > Save Selection and named the selection, which created a new channel. This way I can always go to Select > Load Selection and activate the channel I want to work on at any time. Moreover, these saved selections can be added to or subtracted from another channel in the Save Selection dialog box.
Layers Panel screenshot: An overview of all the channels (selections) created in Step 3
4) When I was making the selections, I was zoomed into the image somewhere between 100% and 800%. These selections had to be precise; otherwise, halos and other negative effects would appear when I adjusted exposure levels and tonal correction levels. While I was processing this image, creating these selections took the most time. The better you are in making selections, the faster your post-processing will go, but like everything else, it takes some practice to become efficient.
5) Before working creatively in Photoshop, I applied Nik Sharpener Pro plugin to sharpen the photo in a subtle but effective way.
6) Back in Photoshop, I created a Smart Object layer and then exported the image to Nik Silver Efex Pro 2 plugin to convert it to black and white. I applied the default black and white conversion and then set Brightness to 10% and Contrast to 18%. Using a Smart Object layer is a very good choice if you want to make other adjustments later on.
7) After this laborious, not very creative work, I began to make special adjustments in Photoshop to the areas of the photo I wanted to enhance:
a) First, I activated my selection of the glass in the middle of the building, applied the Levels tool (Image > Adjustments > Levels) and enhanced the contrast and shadows by moving the sliders to the left side.
b) Then I used the selection of the small windows and darkened them with the Curves tool (Image > Adjustments > Curves).
c) I made the building brighter by activating the saved selection of the building without the windows and moved the sliders in the Levels tool to the right side.
d) I increased the contrast of the sky by using the Levels tool once again on the saved selection of the sky. I also darkened the sky by using the Curves tool.
The image after Step 7 adjustments were made
8) I noticed more adjustments needed to be made:
a) I enhanced the contrast of the glass in the middle of the building once again by using the Levels tool.
b) I darkened the bottom-left and bottom-right windows by using the Levels tool.
c) Then I enhanced the contrasts of the building by applying the Levels tool to the building selection and moving the sliders to brighten those areas.
9) For the next step I used the TK Actions Panel by Tony Kuyper. This actions panel is a powerful collection that makes special selections or effects by using scripts in Photoshop. I created two new layers — one for dodging areas (to make them brighter) and one for burning areas (to make them darker) — and used the Brush to act as Dodge and Burn tools. I darkened the windows by activating the windows selection on the Burn layer and brushing on the layer to burn the windows.
Windows darkened
10) The next step was to brighten the dark windows in a subtle way. For that I used the Dodge layer I created in Step 9. I brightened the windows using a white Brush with Opacity set to about 15%.
Windows brightened
11) After that I used the Clone Stamp tool to remove some disturbing spots in the bottom-left window (some very bright metal cables and a dark, dusty shadow on the wall.)
12) Then I used the Levels tool once again to enhance the dark shadows in the overall image, creating a wonderful geometric structure at the bottom of the building.
The image after Step 12 adjustments were made
13) Next, I darkened the left side of the sky so the light looked even. To do this, I used the Levels tool and applied a layer mask of the sky selection.
14) At this point I was happy with contrasts and tones. The photo had all the elements to make it more interesting than the original image. The only part that wasn't working for me was the wispy cloud at the top of the building; it just wasn't enough. So I copied a cloud from another photo that I found in my photo archives and added it as a new layer.
15) The last step was to remove noise from the photo with Nik Dfine 2 plugin. This is a magical tool that performs noise removal in a very effective and subtle way.
TIPS
1) If you want to make a good photo, take time to prepare. You have to explore the places you want to visit before you actually get there. Which interesting objects should you look out for? What will the weather be like? What's the best time to take photos? Think about the equipment you may have to use to get the best results.
2) Once you are actually there, follow the light and take enough time to explore the place for the best point of view.
3) Improve your knowledge of special software to create an impressive photo.
4) Think about the details and understand which elements are distracting.
5) Be careful when you're editing your photos. Selections can be very helpful to apply special treatment to certain areas in your image, so work on creating precise selections with the utmost care. Creating selections may take a lot of time, but for a very good photo, your time will be well spent!
BIOGRAPHY
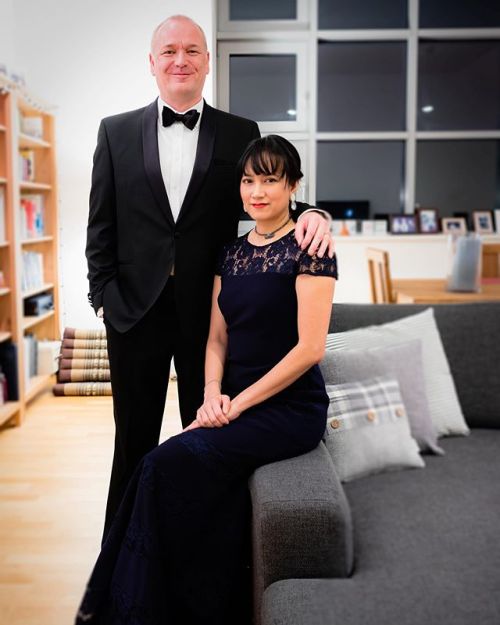
I am an amateur photographer from Bad Oeynhausen in midwestern Germany. In 2007 I started using a Pentax K10D; it was the first time I used a digital camera. Ever since I have learned a lot about photography by reading good books, visiting and studying many websites and learning from good photos, such as those on 1x. I have been a member of a local camera club since 2008, and I enjoy discussing photography.
I'm an engineer for an administration organization in Gütersloh. Photography has become a wonderful part of my life because it allows me to relax after a stressful daily routine. Through photography I am able to take time out to think about things other than my job or family. I love to take tours with other photographers to visit new places I have never seen before.
There is only one thing that comes before my photography: my wonderful family!