Tips & Tricks
How to Rig and Animate a Character in Cartoon Animator and After Effects
Tuts+PhotographySetting up and animating a character couldn't be easier! In this tutorial, you will learn how to animate using Cartoon Animator and After Effects.
What You'll Learn in This Animation Tutorial
Cartoon Animator has all the tools necessary to create simple to sophisticated bone rigs. Using one of Cartoon Animator's default characters, we'll show you step-by-step how to rig and animate a 2D character. You'll learn:
- How to use character templates in Cartoon Animator
- How to rig a character for your animations
- How to import your animation in Adobe After Effects
- How to enhance the animation even further using Adobe After Effects, creating a looping background scene
In our next tutorials, we'll explore how to make a talking avatar, how to create smooth head-turns, and how to animate any photograph.
What You'll Need
To follow along with this tutorial you will need your own versions of Adobe After Effects and Cartoon Animator. You can download a free trial version for Cartoon Animator on the Reallusion Website.
You will also need a scene. We used the following graphic packs from Envato Elements, click on the links to download them:


1. Create a Body Dummy
Before we begin to create our own custom character, let's take a look at the Content Manager inside Cartoon Animator. Here we will be able to browse through the library of character templates, heads and body shapes that we can use as a starting point.
You can access the Content Manager by going to Window > Content Manager or by pressing F4 on the keyboard.


Once you have access to the Content Manager, select the Actor tab and then select Template.


From here you can browse through all the different types of characters, heads, body types and accessories that you can use for your animation.
To create a rig for your character we need to navigate to Actor Template > Character > _G3 360 > 1_G3 360 Human > Dummy for 3D Motion to access all the available body dummies that you can use.
From here you can choose the angle which fits closest to your character:
- Dummy_1 Front
- Dummy_2 Front Side
- Dummy_3 Side
- Dummy_4 Back Side
- Dummy_5 Back


For this example we will be using a character which is facing to the side at an angle, so let's use Dummy_2 Front Side by clicking and dragging it into the scene.


Zero the Dummy
With the dummy selected, click on the Zero Key button at the top to make sure that it is on the scene route.


2. Use the Composer Mode to Rig Character
To replace the sprites of the character we need to enter Composer Mode by clicking on the button near on the top left of the stage preview window.


Upon entering Composer Mode you will notice that the bones now appear on the Dummy. If they don't, you can click on the Show Bone check box to activate it.


Select the Hip Bone
Use the mouse to select the Hip Bone, which will then be highlighted in a dark blue colour. Then click on the Sprite Editor button.


Within the Sprite Editor you'll see what sprite has been assigned to the bone that you have selected (in this case the upper torso has been assigned to the hip bone). We can now replace this with our own images.
Click on the Replace Current Sprite button to replace the image.


Hip Replacement
Locate the hip of your new character and click Open. Ideally your character should also be separated into different assets as well so that it matches the dummy. It also helps if you use the same naming convention as the Dummy Template. For example:
- Head
- Hip
- LArm
- LFoot
- LForearm
- LHand
- LShank
- LThigh
- RArm
- RFoot
- RForearm
- RHand
- RShank
- RThigh


Click the Open button, this will replace the dummy hip sprite with your new hip sprite.


Repeat the steps for the bones that have been assigned to sprites in order to rig your character. As you replace each sprite you may need to make some adjustments to the bones or sprites (so that they fit) along the way.


Preview
Once you have finished importing all your character assets, make sure to use the Preview button, located on the top toolbar. This will allow you to test your rig by moving each individual body part to make sure that it is all working correctly.


Return Back Stage
Once you are happy that your rig is working it's time to go back Back Stage so that we can add some animations to your newly rigged character. Click on the Back Stage button.


3. Add Animations to Your Character
To add a ready-made animation to your fully rigged character, simply go to the Content Manager and then select the Animation tab to browse through the library of different animations you can use. For this example we will use: Animation Template > Motion > 1_G3 Human > _Turners_Female > Side > Run Fast(2L).


Add Animation
Use the mouse to click and drag the animation onto your rigged character. This will automatically start the animation. Otherwise you can simply click on the play button at the bottom of the screen.


4. Export to Adobe After Effects
Now that we have a fully animated character, it is time to take it into Adobe After Effects where we can enhance the animation even further.
To do this simply click on the Ae button located on the top toolbar or go to Render > Export to After Effects.


Install Script
From here you will need to click on the Download Script button to download the script which you will next install in Adobe After Effects.


To install the file into Adobe After Effects, unzip the Zip file and then paste the file Cartoon Animator - AE Script (Beta).jsx into the ScriptUI Panels folder, which is by default located at the following path:
-
Windows:
C:Program FilesAdobeAdobe After Effects <version>Support FilesScriptsScriptUI Panels
-
Mac:
Applications/Adobe After Effects CC <version>/Scripts/ScriptUI Panels
If this folder does not exist, then create a folder with the name ScriptUI Panels.


Back in Cartoon Animator make sure that you have checked the following before you export:
- Your character is selected under Select Object(s): this is the character that you have created and animated in Cartoon Animator
- Adjust your Export Settings, including the resolution and frame size
- And finally you can choose the export range to determine how much of your timeline you want to export into Adobe After Effects
Once you've checked through all the options click on the Export button and choose a desired destination for your new Adobe After Effects file.


5. Add a Background to the Animation
To import your animation into Adobe After Effects you need to go to Windows > Cartoon Animator - AE Script (Beta).jsx which will open up a new panel.


Click on the Import Project (JSON) button and locate the project location. Select the JSON file you exported from Cartoon Animator.


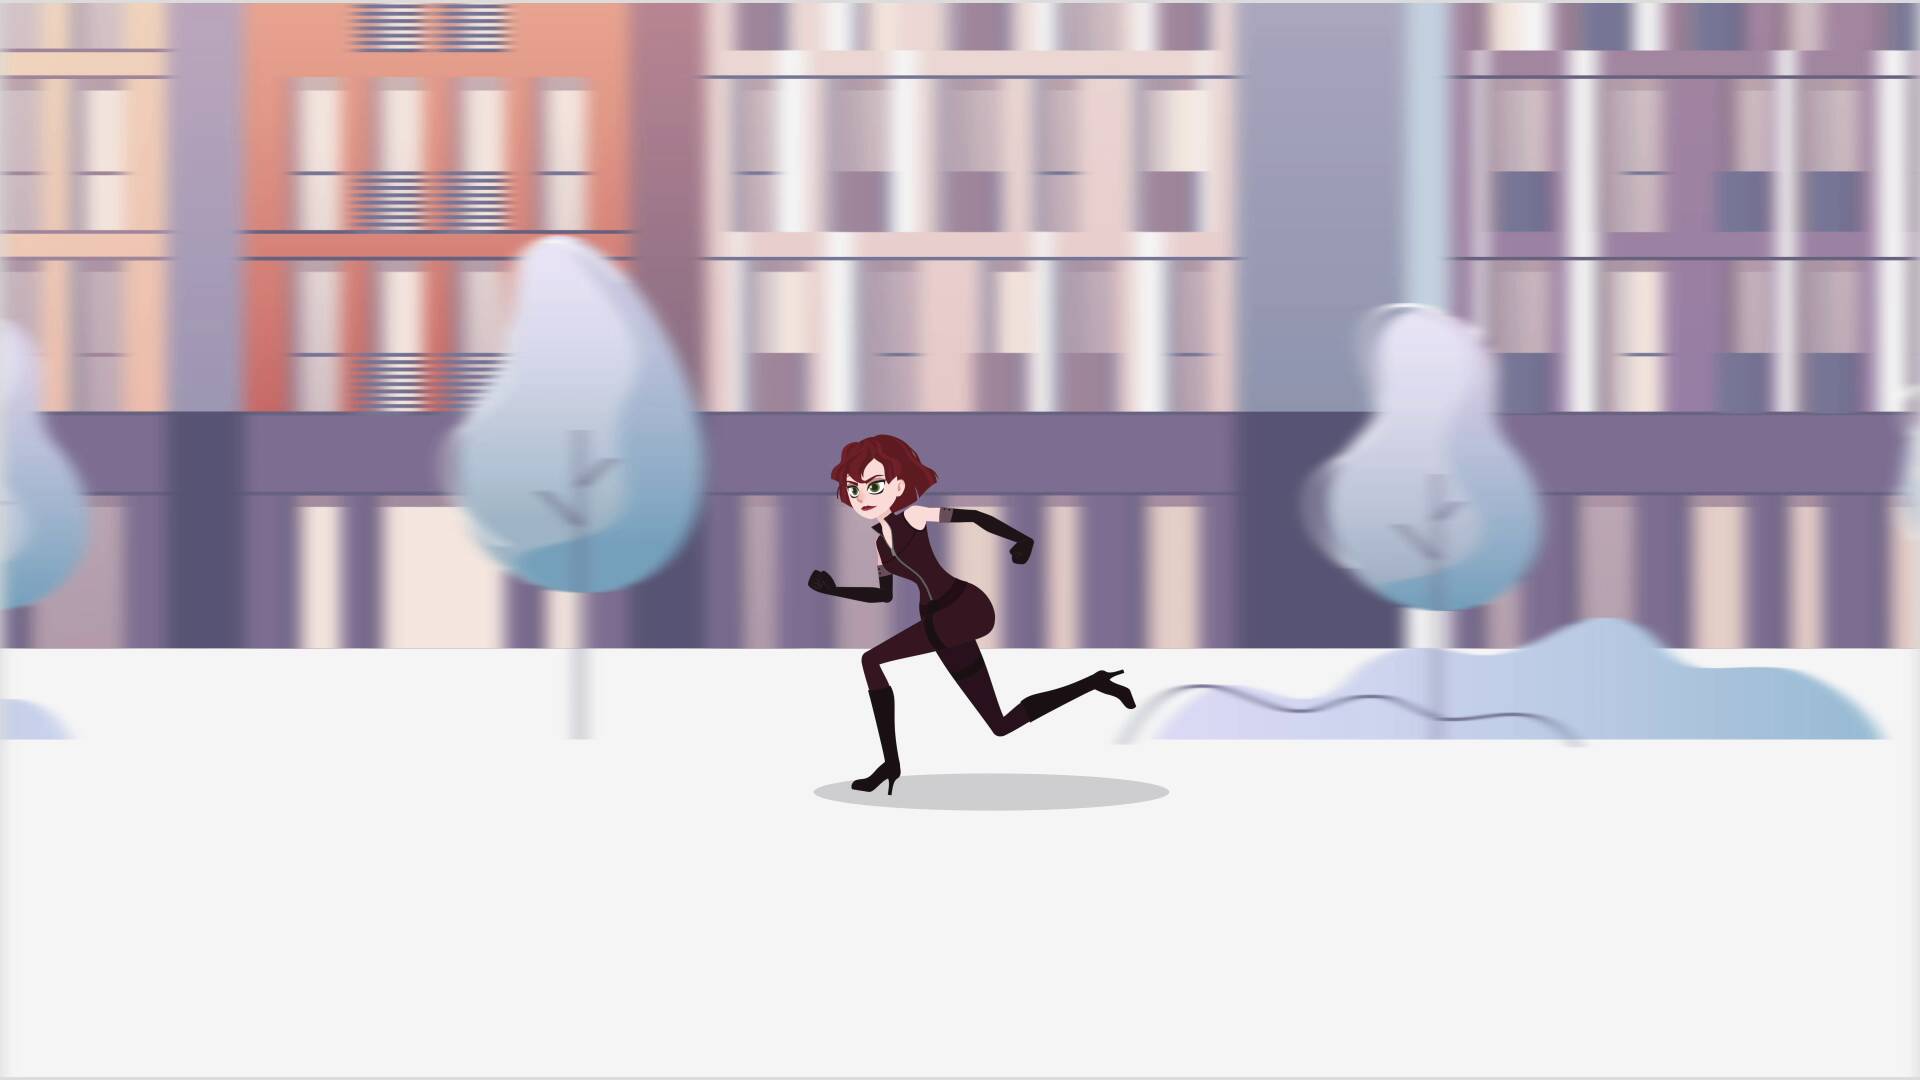
This will open up the character running animation that we created in Cartoon Animator! Now we can treat this animation as if it were any other After Effects project. For example, let's add a new background into the project.


Import New Background
Import a new background image into After Effects by clicking and dragging the image into the Project Panel or by going to File > Import > File.


Open the Scene Composition
Open up the Scene Composition by double clicking on it either in the Project Panel or in the currently open composition.


Hide Old Background
Hide the current background by clicking on the Eye Icon next to the background layer.


Replace With New Background
Replace the background layer with the new one by clicking and dragging it into the composition from the Project Panel.


Adjust and Position
Open up the new layer to access the transform options so that you can edit the Scale and Position options if needed.


Resize and reposition the background until you are happy with the results!


6. Create a Moving Shadow
Create a Shadow
Create a shadow underneath the character by using the Ellipse Tool (Q) and setting the Opacity to 20%. Then use the following colour settings:
- R: 40
- G: 39
- B: 49


Now let's get the shadow to move. Open up the Transform options for the shape layer and remove the Constrain Proportions link for the scale properties. This will allow you to change one value without affecting the other.
Create Three Keyframes
Then create three Keyframes for scale along the Timeline, placing each keyframe in conjunction with the characters movements if possible.


Go to the middle keyframe and use Scale to reduce the width of the shadow so that it is smaller than the other two.


Remember to try and time the keyframes with the character animation.


Easy Easing
Select all the keyframes and then press F9 to add Easy Ease to all the keyframes.


Loop the Animation
Now we need to loop this animation. To do this we are going to use a Looping Expression. This is done by holding the Alt key on the keyboard (Command key on Mac) and left-clicking the stop watch icon.


Then replace the text with loopOut() to loop the scale animation we created.


7. Create a Looping Background Scene
Let's get the background to loop too.
Create a Precomp of the background layer by right-clicking it and selecting Pre-Compose. Make sure to select Move all attributes to new composition.


Select the Region of Interest button located between the 'Full' and 'Active Camera' drop down menus at the bottom of the preview panel.
Then select the whole background by clicking and dragging the with mouse.


Crop Comp
Now go to Composition > Crop Comp to Region of Interest.


Create a Moving Background
Go back to the Scene composition and select the background pre-comp.
To create a moving background, add an Offset preset to the background pre-comp layer. To do this simply select the background layer and then go to Effect > Distort > Offset or type in Offset in the Effects and Presets panel.


Make sure the timeline is set to the beginning of the animation and create a keyframe for Shift Center To.


Move forward a few frames in the timeline and using the mouse, click and drag the first value to move the background.


In order to loop the animation without any jumps it is important to input the same width value as the actual background file itself. This can be found using the Project Panel and selecting the background image.
In this case the width of our background is 7088 px so we should input the same value for our keyframe.


Loop the Animation
Now we need to loop this animation. To do this we are going to use a Looping Expression.
This is done by holding the Alt key on the keyboard (Command key on Mac) and left clicking the stop watch icon. Then replace the text with loopOut() to loop the moving background animation you just created.


Add Directional Blur
You can also add some directional blur to the background by going to Effect > Blur and Sharpen > Directional Blur. Then set the following:
- Direction: 90 Degrees
- Blur Length: 20


Awesome! You're Finished!
Congratulations! And that's how you can rig and animate a character using Cartoon Animator and Adobe After Effects!
Now that you are familiar with the techniques, why not experiment with different character designs or use another background image? Once you have imported your animation into After Effects you can check out even more tutorials below and apply them to the project.
In the meantime, I hope you've found this tutorial useful and I'll see you next time, on Envato Tuts+!